Solar LED lights, with their advantages of energy saving, environmental friendliness, and no wiring required, have become a mainstream lighting choice for home gardens and outdoor settings. However, many users encounter problems after 1-2 years of use: the lights become dimmer, the battery life is significantly shortened, and they may even fail to light up properly. This raises the core question: Can solar LED lights have their batteries replaced? Will replacing the batteries restore normal operation? The answer is not absolute; it depends on the design type of the light fixture and the battery specifications. This article will start with the role of the battery in solar LED lights, providing a detailed analysis of methods for determining battery replaceability, practical replacement steps, precautions, and common misconceptions, helping you easily solve the problem of battery degradation.Ground-mounted or Wall-mounted Solar Garden Lights
I. Understanding the Principle: The Battery is the “Energy Heart” of Solar LED Lights
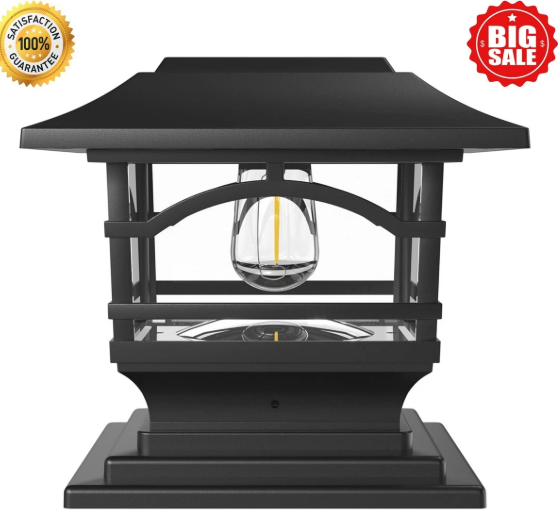
To determine whether a solar LED light’s battery can be replaced, it’s essential to understand the battery’s core role in the entire system. Solar LED lights mainly consist of four components: a solar panel, a battery, LED chips, and a controller. The core function of the battery is “energy storage”—during the day, the solar panel absorbs sunlight and converts it into electrical energy, which is stored in the battery; at night, the battery powers the LED chips through the controller, providing illumination.Solar LED Light Color Temperature Selection
Because batteries have a limited charge-discharge cycle life (typically 500-1500 cycles for lithium and gel batteries), they will experience capacity decay (i.e., “aging”) after prolonged use. This manifests as shorter battery life and decreased brightness, a common problem with solar LED lights. Whether the light fixture can be repaired by replacing the battery depends on whether it features a “replaceable battery design.”Which Solar Garden Lights Are Brightest?
II. Core Answer: Solar LED lights have replaceable batteries, but there are two scenarios:
For purchases, please add the following WhatsApp contact.
Not all solar LED lights have replaceable batteries. They can be categorized into two types: “replaceable design” and “integrated sealed design.” The replaceability and difficulty of replacement differ significantly between the two:
- Replaceable Design: Most mid-to-high-end lights support easy battery replacement.
These lights have a dedicated battery compartment or a detachable casing for easy maintenance. They are commonly found in mid-to-high-end models such as solar garden lights, ground lights, and wall lights.
- Identification Method: The light fixture has a clearly visible battery compartment cover (usually secured with screws), or the casing can be opened by removing the screws to directly expose the battery (mostly cylindrical lithium batteries, square gel batteries, or lead-acid batteries). Some instruction manuals will explicitly state “replaceable battery.”
- Replacement Difficulty: Low to medium. No professional tools are required. Ordinary people can replace the battery themselves as long as they match the correct specifications.
- Applicable Scenarios: Commonly used household solar ground lights, wall lights, and garden lights, as well as large-scale outdoor solar street lights.
- Integrated Sealed Design: Inexpensive Small Lights, Virtually Unreplaceable
These lights, to control costs and simplify structure, integrate the battery, light body, and controller into a single sealed package. Commonly found in low-priced solar string lights, mini ground lights, and decorative lights:
- Identification Method: The light fixture has no detachable parts; it’s a completely sealed structure (mostly injection-molded plastic); the price is low (usually under tens of yuan), and the instruction manual does not mention battery replacement.
- Replacement Difficulty: Extremely high, requiring forceful disassembly (such as cutting the outer shell). Disassembly will damage the light fixture’s waterproof performance and structural integrity, and the internal battery is often a custom-made small-sized battery, making it difficult to find a matching model.
- Applicable Scenarios: Disposable decorative solar string lights, mini lawn lights, etc.
III. When to Replace Solar LED Light Batteries? 4 Obvious Signs
If your solar LED light supports replaceable batteries, the following indicates that the battery is aging and needs replacement:
- Significantly Reduced Battery Life: Previously, a full charge lasted over 8 hours, but now it only lasts 2-3 hours, or even less.
- Noticeably Reduced Brightness: The light is dim at night, far less bright than when it was new, and even a full charge on a sunny day doesn’t improve this.
- Reduced Charging Efficiency: Even after being left out all day on a sunny day, it still cannot light up properly at night, or it lights up and quickly goes out (excluding issues like solar panel obstruction or damage).
- Battery Bulging/Leaking: Upon opening the battery compartment, the battery casing is found to be bulging, deformed, or leaking liquid (this requires immediate replacement to avoid safety hazards).
IV. Practical Guide to Replacing Solar LED Light Batteries: 5 Easy Steps
For solar LED lights that support battery replacement, as long as you follow the principle of “matching specifications + standardized operation,” even ordinary people can replace them themselves. The specific steps are as follows:
- Prepare Tools and Materials
- Tools: Screwdriver (choose according to the type of screws in the battery compartment, commonly Phillips or flathead), insulated gloves (optional, to avoid direct contact between hands and the positive and negative terminals of the battery);
- Materials: A new battery with matching specifications (key points: voltage, capacity, and type must be consistent with the original battery, explained in detail later).
- Safely Disassemble the Light Fixture/Battery Compartment
- First, remove the solar LED light from its installation location (e.g., pull a floor lamp out of the soil, remove the fixing screws for a wall lamp), and place it on a flat work surface;
- Locate the battery compartment cover, use a screwdriver to unscrew the fixing screws, and open the battery compartment (some light fixtures require disassembling the outer casing first; be sure to keep the removed screws to avoid loss).
- Record the original battery specifications and remove the old battery.
- Pay close attention to the three key parameters of the original battery: voltage (e.g., 3.7V, 6V, 12V), capacity (e.g., 2000mAh, 5000mAh), and type (e.g., lithium battery, gel battery, lead-acid battery). Also note the positive and negative terminal connections (taking a photo is best to avoid incorrect installation);
- Gently disconnect the old battery’s wires (or cut the solder joints; if soldered, a soldering iron is needed), and remove the old battery (if the battery is bulging, do not squeeze it forcefully to avoid leakage).
- Install the new battery and restore the lamp’s structure.
- Connect the new battery’s wires to the lamp’s interface according to the original battery’s positive and negative terminal orientation (for soldered batteries, use a soldering iron to firmly secure the solder joints), ensuring a tight connection without looseness;
- Place the new battery into the battery compartment, close the battery compartment cover, and tighten the screws with a screwdriver; if the lamp’s outer casing was previously disassembled, reassemble and secure it.
- Testing Usage
- Place the solar LED light with the replaced battery in a sunny, unobstructed location and charge for 4-6 hours (sunny day);
- Observe the light at night to see if it lights up normally, recording the brightness and runtime. If it returns to near-new condition, the replacement was successful.
V. Key Points for Battery Replacement: 3 “Must-Match” Factors to Avoid Pitfalls
The core of battery replacement is “matching.” Incompatible parameters will not only prevent normal use but may also damage the light controller and even cause safety hazards. The following three points must be noted:
- Voltage Must Be Consistent
Voltage is a core battery parameter. If the original battery is 3.7V, the new battery must also be 3.7V; if the original battery is 12V, a 6V battery cannot be selected. Excessive voltage will burn out the controller and LED beads; insufficient voltage will not provide enough power to the light, resulting in insufficient brightness or failure to light up.
- Capacity Must Be Compatible with Upgrades, Not Too Low
Capacity determines runtime, measured in mAh (milliampere-hours). It is recommended that the new battery capacity be greater than or equal to the original battery capacity (e.g., if the original battery is 2000mAh, replace it with a 3000mAh battery for longer battery life); however, do not choose a battery with too low a capacity (e.g., replace a 2000mAh battery with a 1000mAh battery), otherwise the battery life will be shorter than before.
- Use the same battery type as much as possible
Different types of batteries have different characteristics. If the original battery is a lithium battery, prioritize replacing it with a lithium battery (high energy density, lightweight); if the original battery is a gel battery/lead-acid battery, prioritize replacing it with the same type (strong stability, low-temperature resistance). It is not recommended to arbitrarily replace batteries of different types (e.g., replace a lithium battery with a lead-acid battery) unless the light controller explicitly supports it, otherwise it may affect charging and discharging efficiency.
VI. Clarifying Common Misconceptions: Avoid These Mistakes
Misconception 1: Can all solar LED lights have their batteries replaced? — Incorrect. Cheap lights with an integrated sealed design are generally not replaceable; forcibly disassembling them will damage the waterproofing and structure.
Misconception 2: Is a larger capacity always better? — Not necessarily. Larger capacity batteries are larger and heavier, so it’s necessary to confirm whether the battery compartment can accommodate them. Excessive capacity may also increase charging time, requiring matching with the solar panel’s power output.
Myth 3: Can I use a new battery without charging it? — Incorrect. New batteries may be undercharged and must be fully charged in sunlight before first use; otherwise, battery life will be affected.
Myth 4: Can I still use a leaking/bulging battery? — Absolutely not. Leaking or bulging batteries pose safety hazards (potential short circuits, overheating) and must be replaced immediately and the old battery properly disposed of.
Summary: Whether a solar LED light’s battery can be replaced depends on the design; is it worth replacing? It depends on the cost.
Back to the initial question: Can solar LED lights have their batteries replaced? The answer is: Lights with replaceable designs (mid-to-high-end garden lights, ground lights, etc.) can be easily replaced; inexpensive, one-piece sealed lights are generally not replaceable, and it’s recommended to replace the entire light.
Is it worth replacing? If the main body of the light fixture (LED beads and solar panel) is intact, and only the battery is aging, the cost of replacing the battery (tens of yuan) is far lower than replacing the entire light (hundreds of yuan), making it extremely cost-effective. If the light fixture has problems such as damaged LED beads or an aging solar panel, then it is more economical to replace the entire light fixture without replacing the battery separately.
If your solar LED light is experiencing problems such as shorter battery life or decreased brightness, and you are unsure whether the battery needs to be replaced, please leave a message specifying the brand and model of the light fixture or a photo of the battery compartment. We will provide you with a targeted assessment and replacement recommendations.